Installing the Summit Events App
The Summit Events App (SEA) is a managed package and has been security reviewed by Salesforce. Installation, along with many other great Salesforce.org Open Source Commons applications, is done through Salesforce.org’s MetaDeploy installer.
Install the latest managed pacakge.
IMPORTANT: Confirm you are logged into the correct Salesforce org where you want to install Summit Events before you begin the installation process (Sandbox vs. Production).
Post Installation Instructions
There are a few steps after you install the SEA managed package to getting your Salesforce org configured to run SEA.
Confirm Summit Events is Installed
- From Setup, search for and select Installed Packages.
- Confirm you see Summit Events App as one of the installed packages.
Create a site subdomain
If your org does not already have a Salesforce “Site,” which is used to display public visual force pages, you will need to set up one. If your org has one set up, you may use the existing Site.
In Setup, go to User Interface -> Sites and Domains -> Sites.
Determine the name you want to use for the Site (it will be in the form of [site.force.com]) and click the “Check Availability” button to see whether or not it is available. Note: Each Site must be unique.
Click on the “Register My Salesforce Site Domain” button.

Once your domain has been registered continue:
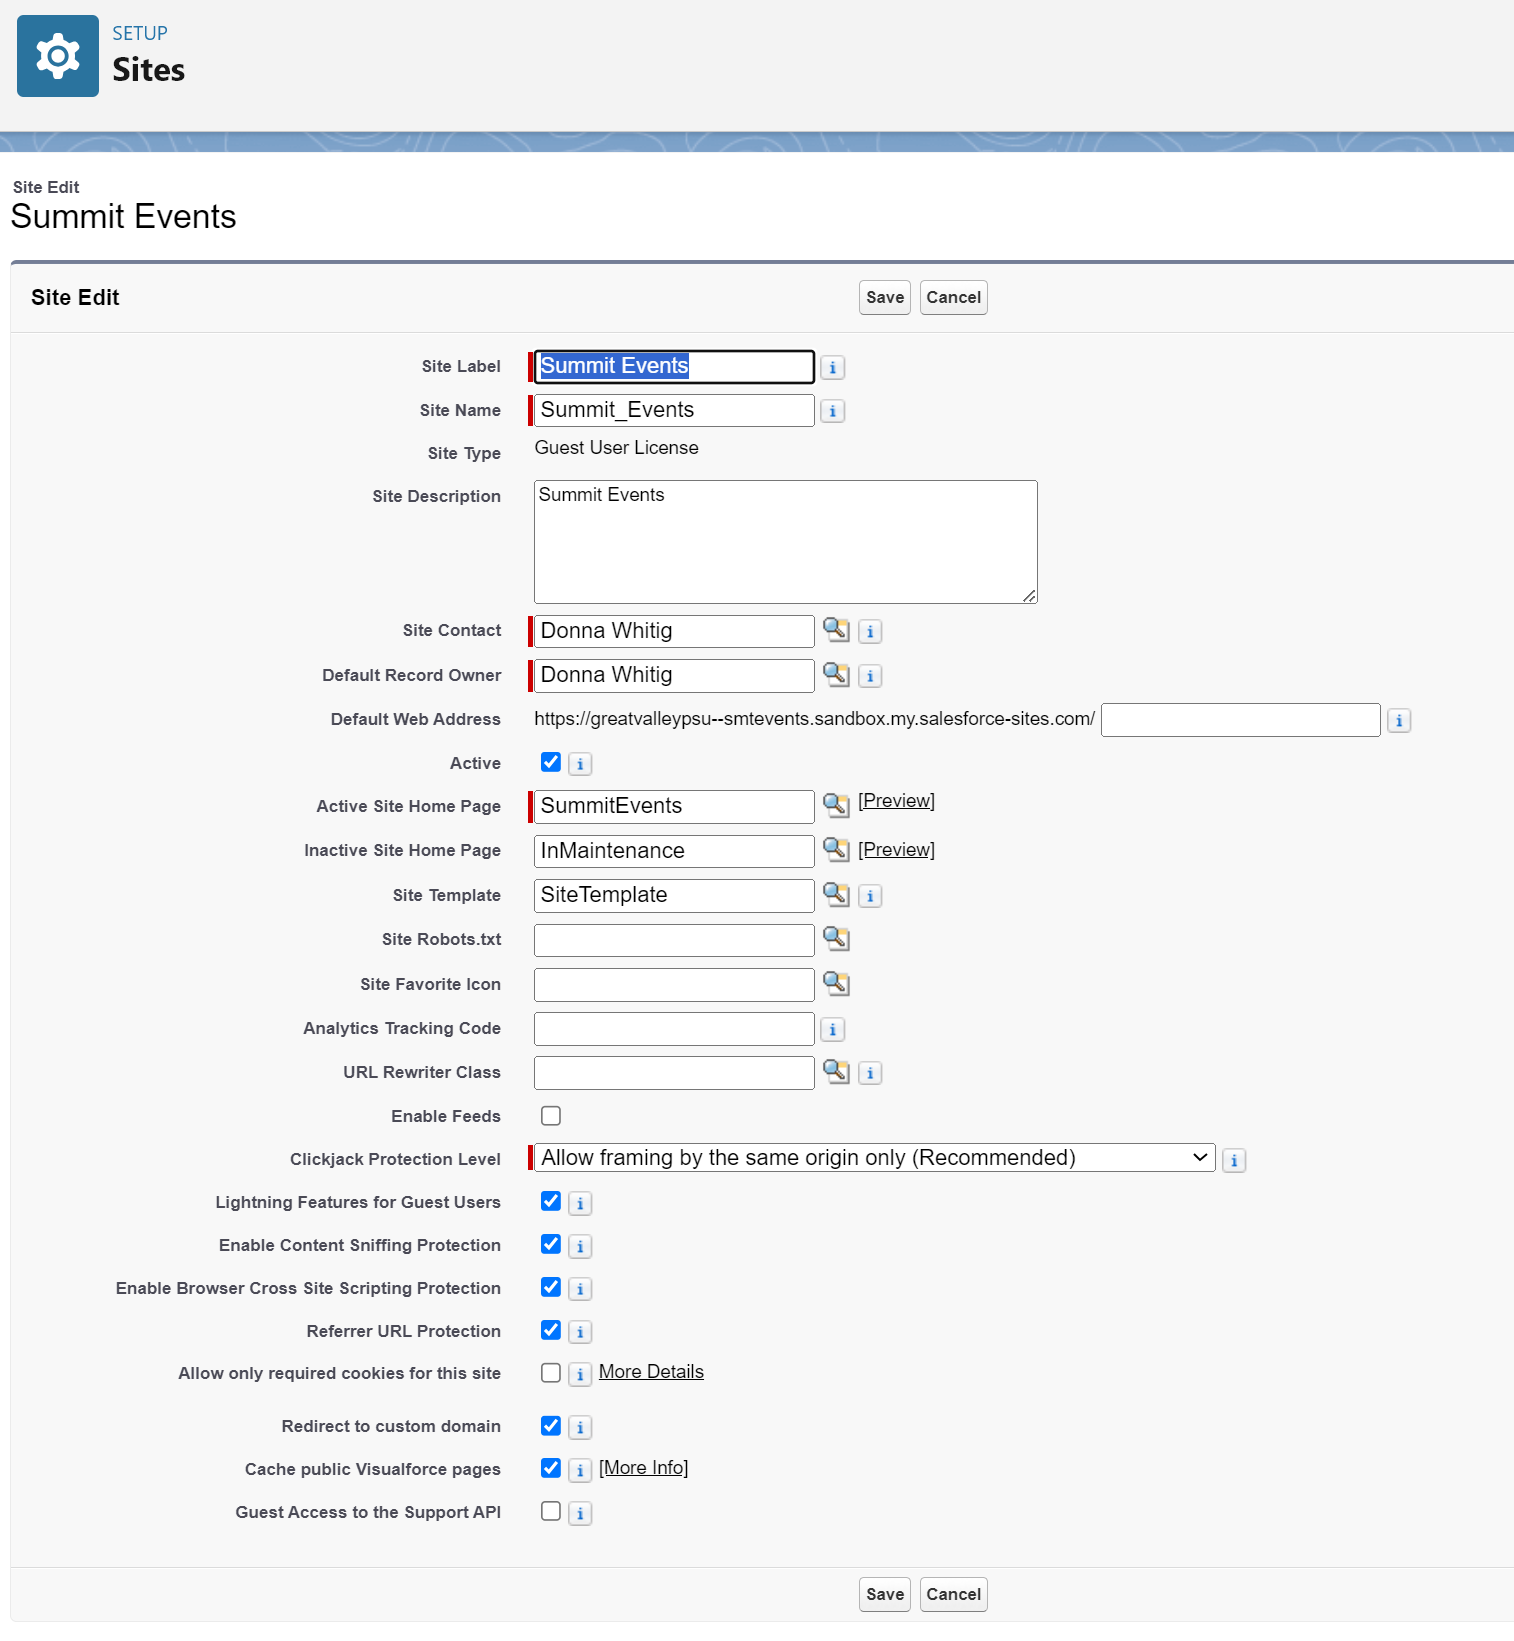
Click the “New” button next to the site header.
- Enter the following data in the form (label, name, and homepage can be adjust to whatever makes sense for your site):
- Site Label: Summit Events
- Site Name: Summit_Events
- Active Site Home Page:
- Select the magnifying glass look-up icon and search for and select SummitEvents.
- Check the Active checkbox to Activate the site upon Save.
- Leave all other settings at their defaults and text areas blank.
Click “Save”.
- From Setup, search for sites. From the list of sites, find the Summit Events site. In the Site URL column, right-click on the Site URL link and copy the URL to your clipboard. You will need the Site URL in the next stage of post-installation set-up steps.

Set Custom Settings
Since each installation can have a different site URL, we need to define that URL for the event application to use as its root web presence. This is used for feed URLs, allowing external sites to access it, among other things. Learn more about other custom settings.
From Setup, search for Custom Settings.
Click on the “Manage” link next to the custom setting “Summit Events Settings”.
Click the “New” button at the top of the page just before the “Default Organization Level Value.” NOTE: There are two “New” buttons on the page, which can be confusing. You will know you are on the wrong one if you are asked to assign a user or a profile. You will know you are on the right one if you only need to enter the URL in the following step.
Paste the URL you copied from the “Create a site record” section (step 6 above) into the Community Base URL field.
In the Default Country field add United States or your Country if different.
Click the “Save” button.
Once you hit “Save” the “New” button will be replaced with “Edit.” (You will need to click the Edit button to make future adjustments to this setting.)
Sharing Rules - Release 37-0-1 removes the need for sharing rules.
Important: If you are upgrading to version 37-0-1 or greater, follow the instructions in the version 37-0-01 release notes to delete the legacy sharing rules.
Apply Permission Sets
There are two permission sets provided in this application. These permission sets should be leveraged to ensure functionality persists between upgrades.
- Summit Events Admin - allows users to create and maintain events
- Summit Events Registrant - allows unauthenticated users and authenticated users in a community to register for an event
Summit Events Admin: Apply to admin users that need to create and maintain events.
Note: Users who are not system administrators but who will administer Summit Events will need this permission set. You do not need to add the Permission Set at this time, but follow the steps bulleted below if/when you need a user to administer Summit Events. It is recommended that the Summit Event Admin permission set is cloned so appropriate configurations can be made to reduce/expand access to various fields.
- In Setup search for and select Permission Sets.
- Click on Summit Events Admin or your cloned Summit Events Admin permission set.
- Click on the “Manage Assignments” button.
- Click the checkbox next to the user who will administer Summit Events and click the “Add Assignments” button.
Summit Events Registrant: This permission set needs to be applied to the Guest User profile of your site for the public to be able to access to registration forms. In addition, a custom permission set should be created to give additional access based on event configurations.
Create a Custom Permission Set for the Guest User
This custom permission set allows you to add additional permissions for the guest user without worrying about issues during upgrades. This permission set combined with the packaged Summit Events Registration permission set gives your organization the most flexibility. It ensures Summit Events App works seamless with any upgrade and the Guest User always has the appropriate access to recieve event registrations.
- Create a new Permissions Set.
- Label the permission set to align with the Summit Event Registration for Guest Users - Example: Summit Events Registrant Custom.
- Go to Object Settings and grant “READ” access on the Account object. No additional fields needed.
Once you’ve create the Custom Permission set, apply it to the Guest User as outlined below. With this custom permission set, you’ll be able to grant appropriate access to any additional objects or fields being utilized for Summit Events as well as the following:
- Avoid disruptions and limit additional configurations during upgrades.
Leverage Summit Event Questions and the Lookup options for improved data integrity.
We recommend assigning users to the standard permission sets since they can change with each release as new features become available in Summit Events (SEA). Cloning the existing permission sets to create custom permission sets could result in users not having access to features or functionality when the standard SEA permission sets change. If you need to add additional permissions we recommend that you create a custom permission set to house those permissions and assign that permission set in addition to the standard permission set.
Apply Summit Events Registrant permission set and the custom permission set you created to the Guest User of your site
- From Setup, Search for and select Sites.
- Under the Sites section, click on the words Summit Events in the “Site Label” field.
- Click on the “Public Access Settings” button at the top of the site definition page.
- On the Summit Events Profile page, click the Assigned Users button.
- Under the Full Name column, click on the Site Guest User name (Site Guest User, Summit Events - which is a link).
- On the Summit Events Site Guest User page, scroll down to Permission Set Assignment and click the “Edit Assignments” button.
- In the Available Permission Sets section, click on Summit Events Registrant and click the “Add” button. Repeat this process for the new custom permission set you created. This will move them both into the Enabled Permission Sets section.
- Click the “Save” button.
Congrats! At this point, you should have a functioning Summit Events Package.
Check out Post-Installation Considerations for additional considerations you’ll want to make to ensure there is alignment with your organization.