Utilizing Hosts
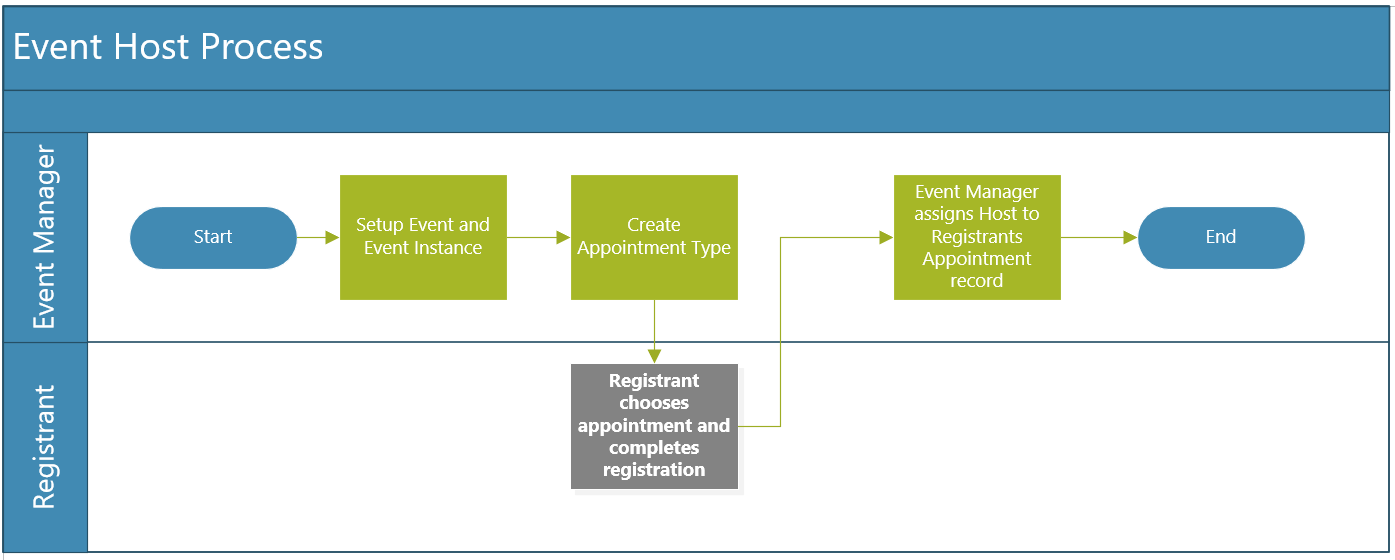
The event host feature, is a backend feature which allows the event manager to create event hosts that can later be assigned by the event manager to specific registrant’s appointments. Hosts can be used for things such as student employee assignments for overnight visit or tours as well as table “hosts” for banquets or workshops. You can create an event host for a specific event instance and it can be applied to an appointment on an event registration record. In our example, students are going to sign up for a campus tour. They can select a morning or afternoon tour. After they register, the event manager will assign the appropriate tour guide (host) to their registration appointment record.
Creating an Event Host
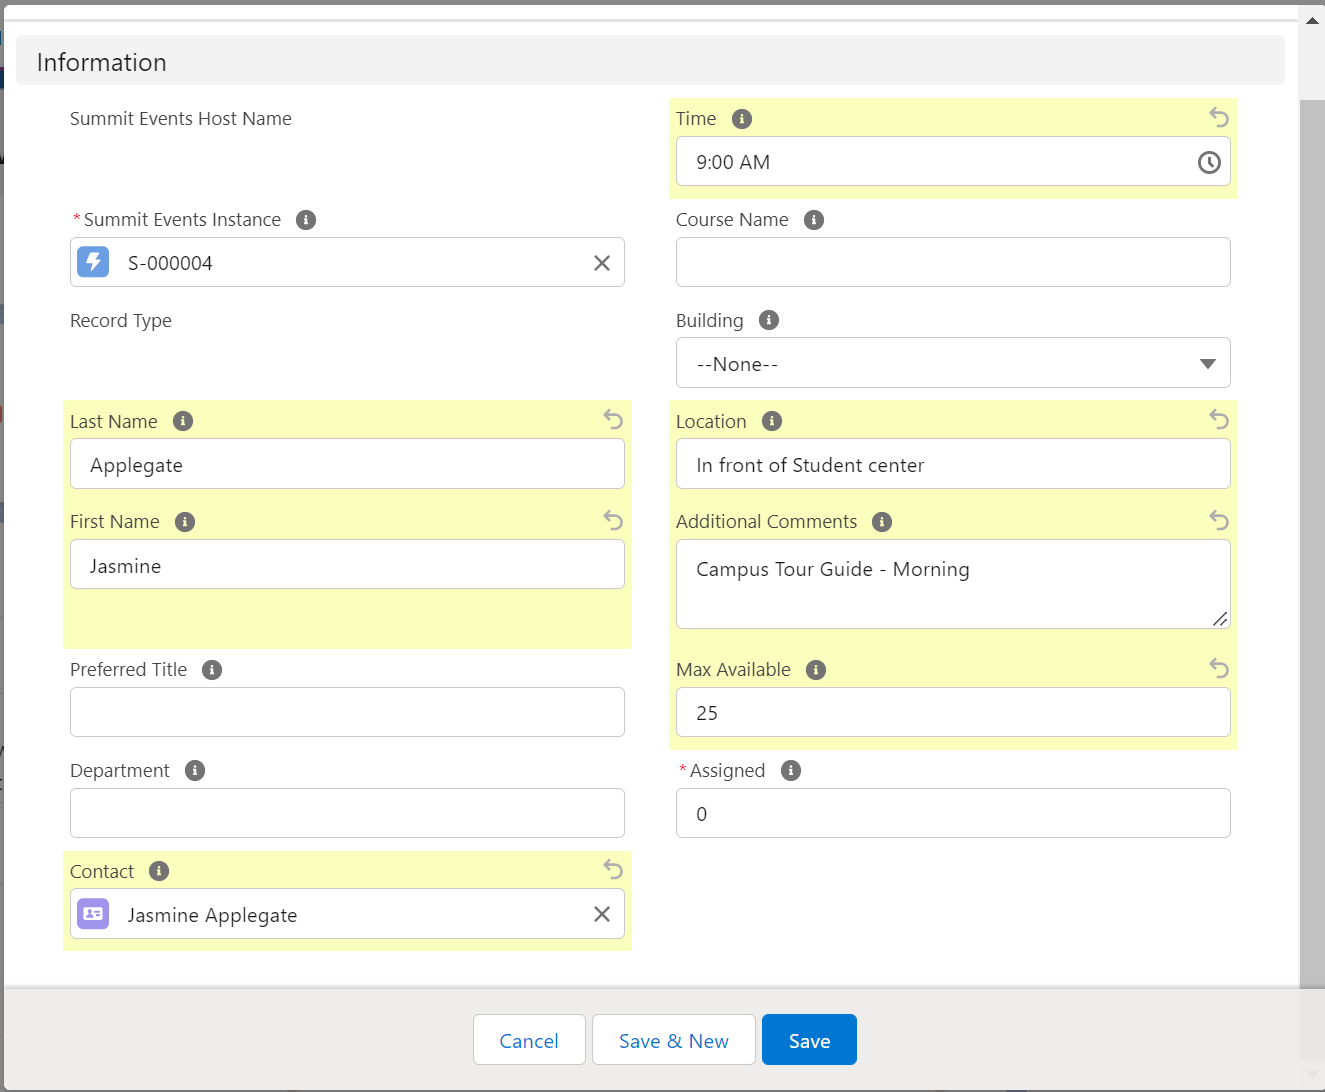
To create an event host from an event instance, begin at the Summit Event Hosts related list on the Summit Event Instance page and use the New button to create a New Event Host. Depending upon your page layout, this could be on the right-hand side of the page, at the bottom of the page or in the Related tab on the page.
Complete the fields related to the new Host and save the record. In our example, Jasmine is going to do the morning campus tour during our event so we’ve entered Jasmine’s name in the hosts name fields. If our host is a contact in Salesforce, we could also link to their contact record. We’ve specified 25 as the Max Available as each campus tour guide (per tour) should have no more than 25 registrants assigned to their group.
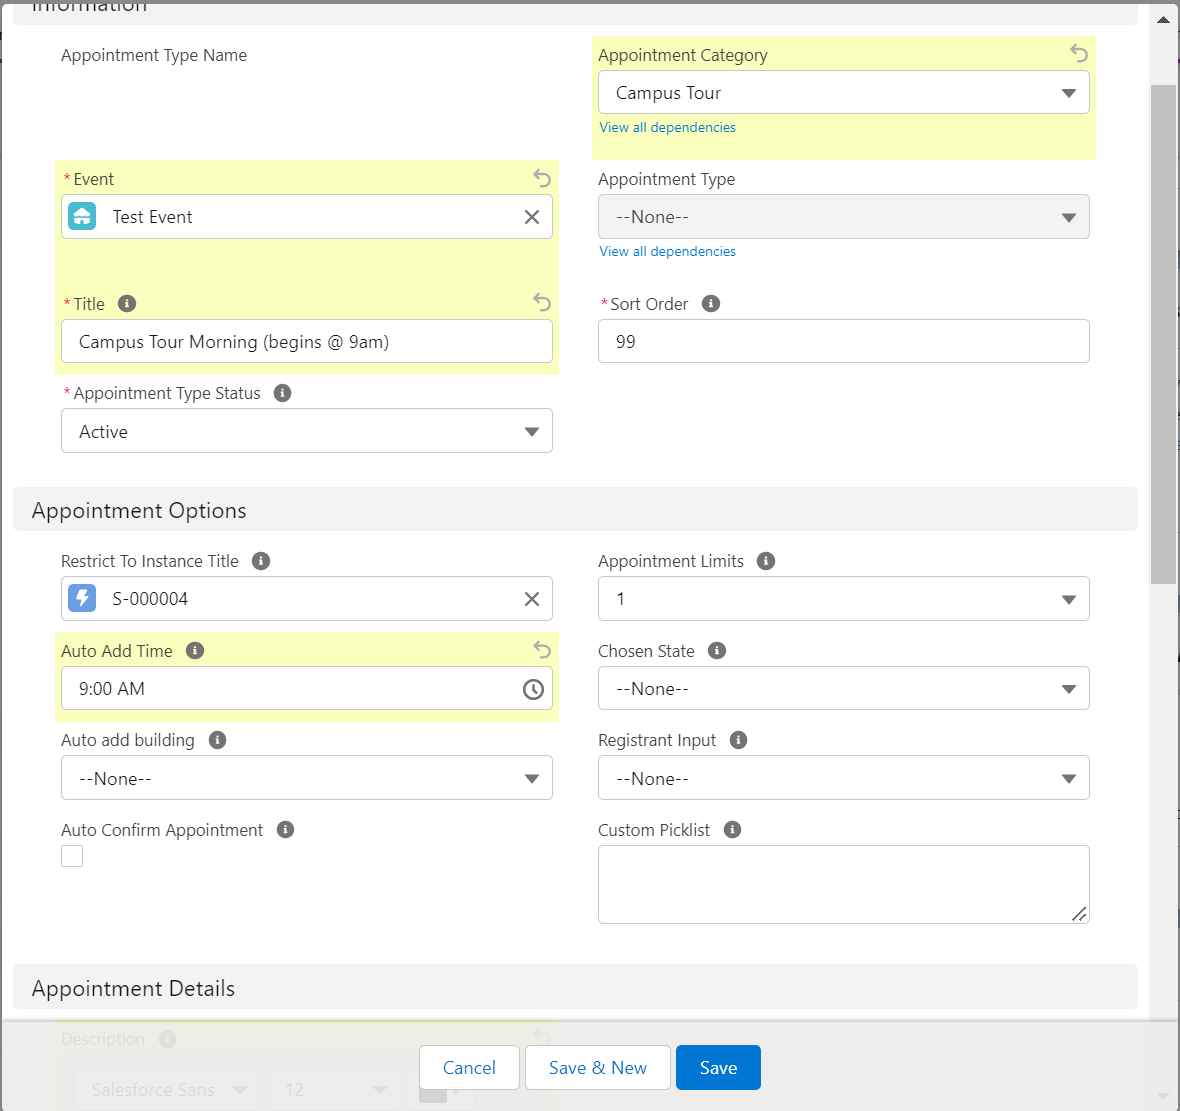
Next create an Appointment Type record. In our example we’ll create an Appointment Type for our Campus Tour that the registrant selects during the registration process. Starting from the Event Instance, select the New button from the Summit Events Appointment Type related list. Depending upon how your page layout is setup, this may be a button directly on the related list or you may need to click on the drop-down arrow and choose New. Click here for more information on Appointment Types.
Enter the details related to the appointment. We selected Campus Tour from the predefined options Appointment Category drop-down but we could also use the custom picklist feature to create any type of appointment type needed. We’ll want to make sure that the proper Event and Event Instance are chosen and complete any other desired information. Click Save to save the new Appointment Type record.
Our setup is complete! Now the Event Manager can assign host’s to the registrants Appointment records. See Assigning Host’s to Registrant Appointments for additional details.
Summit Event Host Detail (Field Informaton)
Summit Event Host Name: An identification number of each event host. It is a standard Salesforce field and displays in a format of HOST-{0000}. The system will automatically generate and assign a number to this field once an event host is created. No need for any user input and this field cannot be edited.
Summit Event Instance: The event instance that the event host belongs to. It is a lookup field that relates to the Summit Event Instance object. As mentioned above, the value must be matched with a record in the Summit Event Instance object. When you hover the cursor over to the Summit Event Instance field on the View page, a mini page of the event instance will show up.
Note: The Summit Event Instance object and Summit Event Host object have a Master-Detail relationship and the Summit Event Instance is the master object. An event host must belong to one event instance. If an event instance is deleted, all related event hosts will be deleted too. Although the event host belongs to an event instance, the event host is directly related to a specific appointment in a registration for a certain event instance. For more details, please refer to “How to assign an event host?” below.
Record Type: The event host record type that you choose in Step 2 above. You can still modify the event host record type after Step 2.
Last Name: Last name of the host (if any).
First Name: First name of the host (if any).
Note: For overnight hosting, the last and first name is usually the name of the responsible person such as an admission officer/student ambassador.
Preferred Title: The preferred title of the host (Professor, Dr., Burgermeister Meisterburger).
Gender: The gender of the host. It is very important for overnight hosting.
Undergrad Major: The undergraduate major that the host is pursuing.
Department: The department where the host is working.
Contact: The contact record in the Salesforce for the host. The value in this field must be matched with a contact record in the system. You can manually enter a value or use the lookup form by clicking the lookup button on the right.
Time: The time of the hosing. The data type of this field is Time.
Formatted Time: The value of the Time field that is in “12-hour AM/PM” format. The data type of this field is Formula(Text).
Course Name: If the event host record type is Class, then this field should have the value of the name of the hosting course.
Building: The name of the building where the hosting will be happening. You can select a St. Thomas building from a dropdown list.
Location: Room and building number, address, where hosting will be happening.
Additional Comments: Additional comments about the host that will appear in any generated itinerary.
Max Available: The number of registrants this host can accommodate.
Assigned: The number of registrants currently assigned to this host. For more details, please refer to “How to assign an event host?” below.
Remaining: The remaining amount of spaces left in the max capacity of registrants a host can take. Remaining=Max Available-Assigned.